House

Floors and flooring

Some decisions are easy. Kitchen, bathroom : tile. Tamsyn’s room, can’t be carpet (asthma) : tile or lino or wood. Other decisions are more difficult. Living room : carpet or tile? Tile is great when it comes to cleaning up red wine spills, but it’s hard and makes a room “ring” very easily. Carpet is quieter.

When we pulled up the existing carpets we found quite nice wooden floors in all three bedrooms. That makes it easy, sand down the wooden floors for Tanya’s activity room (the old small bedroom) and Tamsyn’s room. Carpet Jessica’s room and the space outside the bedrooms / bathroom.

The living room floor is half wood and half slasto (slate stone / leiklip). You can’t tile over a wooden floor. So carpet it is. But you shouldn’t carpet straight over slasto, although the previous owners did. The slasto is uneven, and the carpet will wear on the high spots (thanks Mike). A levelling screed is required. One that can be worked to a feather edge.

So then the question : bring the kitchen tiles out into the dining area / foyer, or bring the living room carpet out into the foyer / dining area? I’m going with the tile idea for now. (Edit : the dining room floor is also slasto).

(And in case you’re wondering the old activity room / new master bedroom has a nice wooden floor which we’re not doing anything to).

Anyway, we bought some tiles from CTM this weekend.

2 square meters ASA2010A San Marco Grey @ R45.90/square : Tamsyn’s bathroom floor.

14 square meters CCL20B1A Cleo Grey @ 59.90/square : Tamsyn’s bathroom walls.

32 Orchid Grey Listello border tiles @ 24.90/each (!) : Tamsyn’s bathroom wall border.

3 Orchid Grey Spotter @ 90.90/each (!!!!!) : Tamsyn’s bathroom wall.

I really should leave Tanya at home when it comes to buying tiles.

10 square meters LC680 Bahamas Beige @ 64.90/square : Kitchen floor.

4 Tunis Corner (110×110 inset tiles) @ 29.90/each : Kitchen floor.

If we tile the dining area etc I’d probably need another 13 squares of the Bahamas Beige.

Edit : Bought another 14 squares Bahamas Beige.

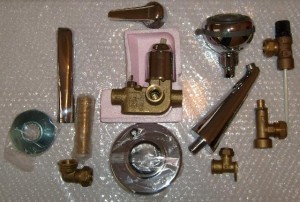
Bling! Plum-bling!

Brass is the new gold. Chrome plating is the new platinum.

This is R1400 worth of plum-bling. And it’s the cheap stuff, mind.

*sigh*

On stove extractor hoods

We never had extractor hoods in our kitchens (OK, I lie, there was one fitted at 15th Avenue, one of the recirculating ones, we didn’t use it much). But when one looks at showrooms or kitchen magazines, it seems an essential piece of kit.

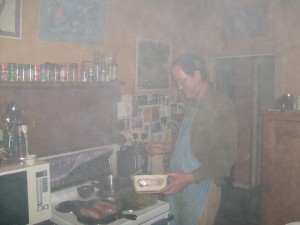
I’ve been slowly convincing myself that we don’t need one (it’s not the cost, so much (R2000 for the Pierre Roblin Rubis 70) but the space that it takes up) but then Pieter cooked baby marrows followed by steaks in his griddle pan last night.

Proof that extractor hoods could be useful.

Raise High the Roof Beam, Carpenters

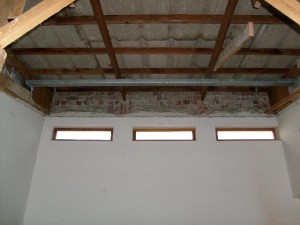
A whole lot of work…

… to gain about half a meter of headroom at the bottom and maybe 300mm at the top.

Oh, and I couldn’t fit both the Libra Misty bath with glass and front panel and the Libra Neptune Euro in the Rand-Lover, so the Neptune’s still at Exquisite Bathrooms. Some other day.

And unless we can find a very good match for the kitchen floor tiles this weekend (we need to replace two tiles) we’ll need to strip & replace the whole lot. Now tiles are, or can be, relatively inexpensive. R50 or R60 per square meter. Having them laid, however, easily doubles this. On the third hand, I have a remarkably versatile chappy working for me, and I suspect he’d be able to lay tile at a rate of knots if properly instructed.

Update, 2008-05-12 : We bought 10 square meters of “LC680 Bahamas Beige 408×408” from CTM at R64.90 per square. Of course the little 110×110 inset (pattern) tiles at R29.90 each pushed up the price quite a lot.

Dreaded Previous Owner

I came across the term “DPO” when I joined the Land Rover Owners mailing list — this is the guy you bought the vehicle from, who sealed an oil leak with bubblegum or put banana peels in the gearbox to hide the whine or rewired the entire vehicle using only one colour wire — you get the idea.

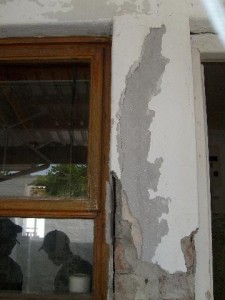
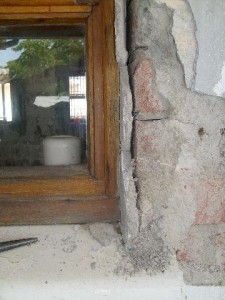
Turns out that houses have DPOs too. This crumbling plasterwork by the [1] kitchen window courtesy of not removing all of the iron framed window when replacing it with a nice new wooden one. The iron rusted, pushed the plaster out, and plastering over it just didn’t work (go figure).

Our “fix” might lead to the next owner of the house future-blog-equivalent-ing about it in much the same way. (We removed as much of the rust as we could, then stuffed the cavity with white shipping foam, then plastered over it, the idea being that future rust expansion would compress the foam and not lift the plaster).

[1] My brother objects to my use of “<over there> by the <something>”. Doesn’t stop me from (ab)using the term.

Because why, I can.

Progress

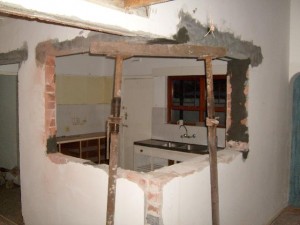
I borrowed a few builders’ props from my father, and we very carefully cut a lintel into the outside of the double wall, propped that up and cemented it in, and then cut a lintel into the other side of the wall… all the time keeping the props in place to prevent the unsupported “corner” where the four lintels come together from collapsing.
Boer maak \'n plan

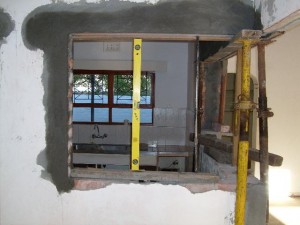
So I come home to this. The props have moved, and are now being used to mostly support the planks used for plastering. I ask Frank about it, “Oh no, this house is very strong”. !

It’s a good thing the house has indeed turned out to be very strong, because the team is young and immortally reckless sometimes…

(Also note the creative use of the spirit level as a temporary support)

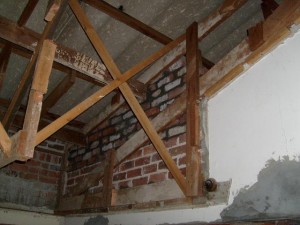
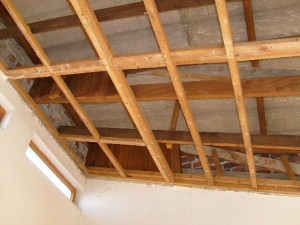
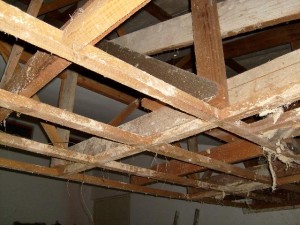
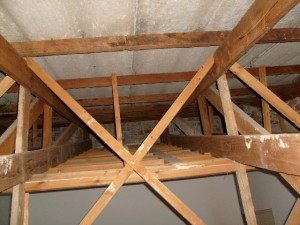
This framework supported the ceiling boards. It’s difficult to see, but the trusses are formed by a beam carrying the roof crossmembers, and another beam below it, with lots of crossbracing.

At the top, both beams are cemented into the wall. At the bottom however, the lower beam hangs from the upper beam, and is not attached to the wall at all.

So I don’t know whether the lower beam is there to carry weight (it can’t) or to hang the ceiling from (in which case, why the cementing at the top and the crossbracing?).

Anyway, the framework had to go. Next thing I saw was two guys on top of the framework, hitting it with hammers to get it off the beams above. Yes, they were lying on the framework while hammering at it. Four meters off the ground.

I also used to be young and immortal but *shudder*. I mean, I was too horrified to even take pictures.

This is (used to be) the hot water pipe on its way up to the shower. I wonder how much energy was wasted heating up the stoep from below.

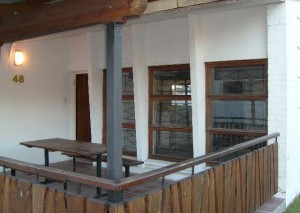
The view from the porch

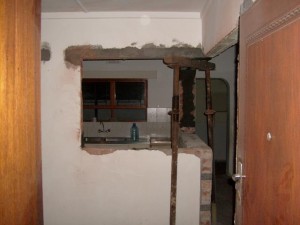
Porch, through kitchen

In, towards the kitchen, that is.

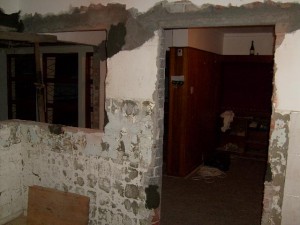
Frank & co made a breakthrough (*coff*) yesterday, the result being an extremely open-plan kitchen.

They also started knocking out the false ceiling, which is going to be a major mission, but we believe the results will be worth it.

The false ceiling runs at a different slope than the roof, so we’ll gain more headroom at the bottom and less at the top. But it’s going to work (we hope…)

Shopping around

We looked at different options for baths and sinks, with aesthetics being more important for the baths and price (and size) being the factor for the sinks. I’ve been set on the Libra Misty bath for a while (it would have been in Jessica’s en-suite bathroom in our previous plans), and Tanya decided on the Libra Neptune Euro for our main bathroom (The “Euro” is the 800mm wide version). When it comes to kitchen sinks, the Franke Curvline is their narrowest option, at 435mm, so I asked for quotes on both the 1235 and 1500mm long versions (all quotes from Exquisite Bathrooms, because they’re just down the road from where I work and because while I’ve been bothering them on and off for a long time they’re still nice to me :-).

Meanwhile Mica in Bellville was running a special on the Neptune Euro, at 1499, but Exquisite Bathrooms came through and quoted 1307 + VAT = 1489. The Misty is expensive at R 4 162 with the front panel included, but it’s… nice. We also like the Verona cloakroom basin (as an addition to the main toilet), but I guess it’s imported, since it goes for about R820, more than I want to spend on a small handbasin (I can get something similar from Mica for under R200).

Exquisite quoted 1066 for the shorter Franke and 1556 for the longer one. The extra 265mm is not worth it in my opinion.

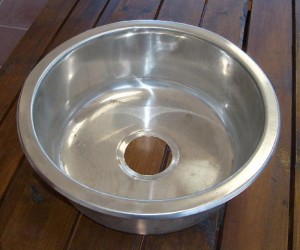
I also balked at paying R605 for a basic round stainless prep bowl, and picked one up at Muizenberg market for R150.

Cheap prep bowl

Comparative shopping also works for toilets — a basic close-coupled dual-flush unit goes for 2200 at one place, but we got a different model from Brights for 499.

And then of course there’s the price of plumbing fittings. Copper pipe is… unaffordable. Which is why I’m reusing as much as possible (unfortunately the existing T fittings are really old, requiring one to flare the pipe over a ferrule, rather than slipping the ferrule over the pipe). There’s a plastic composite alternative, which also uses compression fitting and sells for R11/m. But I can get polycop at Muizenberg market for R3/m (this is all for the 15mm stuff). OK, polycop flows less than the other alternatives, but I can fit 22mm polycop for a lot less than 15mm anything else.

Of course when working with copper one can use the solder type fittings (Solder elbow 5.75, compression elbow 16.50. Solder T 9.50, compression T 21.25) but you need a gas torch, which will set you back a few hundred, so it’s not economical for small jobs. I have the torch, so I’ll be using solder fittings and left-over pipe for some of the plumbing, and polycop for the rest.

Lintels

Once we knock out the wall between the kitchen and the living room, we’ll have a 3.030m hole in the wall — and that weight needs to be supported, not only later, but while doing the actual knocking out.

I went down to the hardware store this morning and bought a number of lintels, from 1 200 for over the doors to 3 600 for the kitchen / living room / living room door arrangement. The wall between the dining room and living room is a single course of brick, around 130mm. The wall between the kitchen and the living room (the one we’re breaking out) is double, 260mm.

So the instructions to the Malawian Trio is to remove a single row of bricks, leaving the wall supported by the other course of the double wall, and to then build the lintel into the resulting hole. We will then prop the lintel up and break out the wall below it.

Update : 2008-04-22.

Lintels, part 1Lintel, part 1.

So I got there to see that they found an existing lintel over the existing door. It was cast in place, too, so it ain’t gonna come out. Hmmm. Should have thought of that. Looks like they then thought to put the new lintel under the old one, which will work, but maybe that makes the doorway too low.

So the new plan is to keep the existing lintel and to add a shorter-than-originally-anticipated lintel to the right, with some kind of a bearing place to support the whole mess.

The pipes! The pipes!

The horror! The horror!

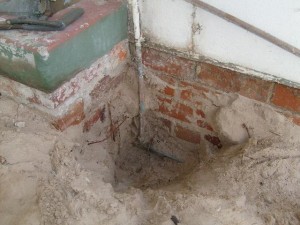
Whoever did the piping had… interesting ideas. I found the main feed, 3/4″, going to the geyser in the roof. Coming from the geyser there’s another 3/4″ pipe, which disappears under the cement stoep and from there presumably some magic happens, resulting in hot and cold water pipes sprouting from the stoep where required.

Cold going up on left, hot coming down on right*shudder*Manifold destiny

Of course this means that the water will take a while to get hot. And I don’t know what the heat loss in or under the cement stoep is — suffice to say that This Must Go.

OK, I need to take bits of the stoep up to plumb in the new bathroom, and other bits of the stoep are cracked, so chopping it all up to get at the pipes is no biggie. En ek skrik nie vir plumbing nie, net vir die prys van koper.

A friend pointed me at a new product on the market — some plastic composite type water pipe that’s compatible with compression fittings (there are also plastic compression fittings available but I’m not sure I trust them). It’s a lot cheaper than copper and flows a lot better than polycop, it might just work.

So I’m off to buy a rather large geyser [1] from De La Rey (which is called Builder’s Warehouse these days but who cares). I’ll see about plumbing a solar collector into this [2].

And then the pipes will run straight and to the point and I’ll even wrap some insulation around them.

Oh Danny Boy..

[1] The geyser that’s in there at the moment sports a five-digit Cape Town phone number (we’re up to 7 these days) which sort of hints at the age of the house. And it’s rusting from the outside in. But mostly it’s one of those horribly inefficient tank types, and now’s a good time to replace it.

[2] Buying a solar, electrically assisted geyser would be easier, good for the environment (or maybe just for Eskom), and roughly ten times as expensive if you include everything. I can’t afford to pay for Eishkom’s mistakes, I’m afraid.